Worm Composting: The Complete Beginner’s Guide
Worm composting (vermicomposting) means letting compost worms such as red wigglers eat your kitchen scraps, cardboard and small amounts of untreated grass clippings in a simple bin. Give them moist bedding, shade, air and small regular meals, and they turn your waste into worm castings – one of the finest soil conditioners a gardener can have.
Just starting? Jump to how to start in 7 steps or the step-by-step 3-tier worm farm guide.
Hello, I’m Stephan. I have been worm farming for nearly 30 years, first in South Africa and now in Germany, and in all that time one thing has never changed: worms are the most forgiving, hard-working little helpers you can invite into your home. You don’t need a big garden, expensive equipment or any special knowledge. If you can keep a pot plant alive, you can keep worms happy.
This guide brings together everything a beginner needs in one place: what worm composting is, why it’s worth doing, which worms to use, how to set up a bin, what to feed, how to keep it healthy and how to harvest the castings. Each section links to a more detailed page when you want to dig deeper.
What is worm composting?
Worm composting, also called vermicomposting, is composting with the help of earthworms. In an ordinary compost heap, bacteria and fungi do most of the work and the pile has to heat up. In a worm bin, compost worms do the heavy lifting: they eat decaying organic material together with the microbes living on it, and leave behind worm castings (also called vermicast or worm humus) – dark, crumbly, earthy-smelling material that plants love.
Because worms work at normal room and garden temperatures, a worm bin can sit on a balcony, in a garage, a shed, a shady corner of the garden or even under the kitchen sink. Done right, it doesn’t smell bad – a healthy bin smells like a forest floor.
Why compost with worms?
- Less waste: kitchen scraps, coffee grounds, tea leaves, cardboard and paper stay out of the rubbish bin.
- Better soil: worm castings improve soil structure and help soil hold water and nutrients.
- Free plant food: the liquid that drains from a bin and the castings themselves feed your plants without bought chemicals.
- Small space, little effort: a few minutes a week is enough for a household bin.
- Great for families: children love watching worms work, and it teaches where food and soil come from.
I’ve listed all my reasons on the page 13 worm composting benefits.
Which worms should you use?
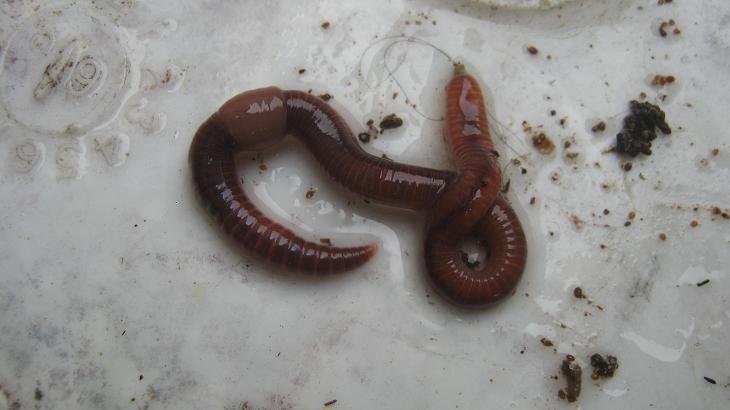
Not every earthworm is a composting worm. The garden earthworms you dig up in a vegetable bed live deep in the soil and won’t settle in a bin. For worm composting you need surface-dwelling compost worms that live in rich, decaying material. The best known is the red wiggler, Eisenia fetida; other species are used in different climates as well.
Compost worms are top feeders: they live in the top layer of the bin, close to the food, and always move upwards towards fresh meals. That habit is what makes stacking bins work so well. They also breed readily when conditions are good, so a small starter population grows into a strong one by itself.
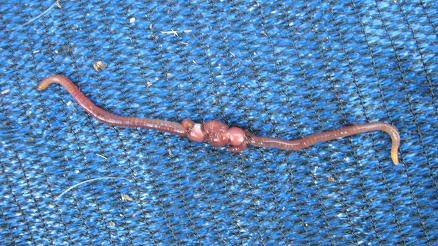
Where to get worms: ask a local worm farmer or a gardener friend who already keeps a bin – many are happy to share a handful. My worm business directory can help you find worm farmers.
Choosing a worm bin
A worm bin only has to do a few things well: keep the worms dark, moist and cool, let air in and let excess liquid drain out. That’s it. You can buy a bin, but you can just as easily make one from plastic containers, buckets, a wooden box or an old bathtub.
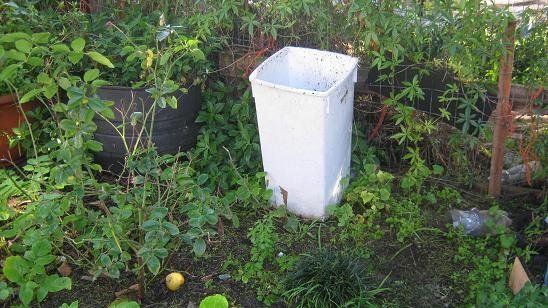
- Single bin: the simplest start – one container with drainage and air holes.
- Stacking (3-tier) bin: trays stacked on top of each other; worms move up to fresh food, which makes harvesting easy. See starting and maintaining a worm farm.
- Homemade bin: cheap and effective. Follow my guide to build a homemade worm compost bin.
Place the bin in the shade. Direct sun can heat a bin to temperatures worms cannot survive, and heavy rain can flood it.
How to start worm composting in 7 steps
- Pick a shady, sheltered spot that is easy to reach – you’re more likely to feed a bin you walk past.
- Prepare the bedding. Soak shredded newspaper or torn cardboard in water, squeeze it out and fluff it into a layer about 10 cm / 4 in deep. A handful of garden soil or old compost adds helpful microbes.
- Add the worms on top of the bedding and leave the lid off for a while in the light; they will burrow down by themselves.
- Feed a little. Start with a small amount of chopped kitchen scraps and bury them lightly or tuck them under the bedding.
- Cover the food with a soaked sheet of newspaper and a piece of plastic or sacking. It keeps moisture in and fruit flies out.
- Wait and watch. Only add more food when the worms have started on the last meal. Increase portions gradually as the population grows.
- Keep it moist – like a squeezed-out sponge – and check on it once or twice a week.
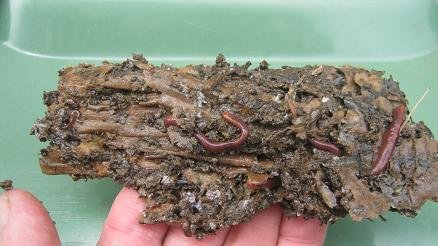
Want to see this with photos for a stacking bin? Go to the step-by-step worm farm guide. Need a shopping list first? See starting a worm farm: the 4 things you need.
What to feed your worms (and what not)
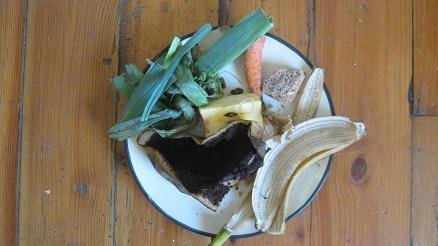
Worms eat almost anything that once lived, but a bin stays happiest on a balanced, moderate diet. Chop food into smaller pieces and it disappears much faster. How much and how often: feeding your worms.
| Good worm food | Avoid |
|---|---|
| Fruit and vegetable peels and leftovers | Meat, fish and bones (smell, maggots) |
| Used coffee grounds and tea leaves in small amounts | Dairy and oily or salty food |
| Crushed / ground eggshells | Large amounts of citrus or onion at once |
| Cardboard, egg cartons and newspapers (also serve as worm bin bedding) | Glossy or coloured printed paper |
| Untreated grass clippings in small amounts | Plants sprayed with pesticides |
For the full picture, see worm food: all you need to know and my detailed worm food rating list. Wondering about specific foods? Read about oranges and orange peels and why worms love old cardboard and newspapers.
Moisture, temperature and air
Moisture: worms breathe through their skin, so the bedding must stay moist – about as damp as a squeezed-out sponge. Too dry and they suffer; soggy and the bin turns sour and smelly. See worm bedding for the best materials. Add dry shredded cardboard if it’s too wet, sprinkle water if it’s too dry. If you can, let tap water stand for a day before using it.
Temperature: compost worms can handle a wide range of temperatures, from 5 °C / 41 °F to 29 °C / 84.2 °F, with the ideal range being between 15 °C / 59 °F and 25 °C / 77 °F. In hot summers keep the bin in deep shade; in cold winters move it somewhere sheltered, such as a garage or shed.
Air: worms need oxygen. Air holes, fluffy bedding and not overfeeding keep a bin aerobic and sweet-smelling.
Plan your first 90 days with the Easy Worm Farming Planner
My Easy Worm Farming Planner is a 72-page step-by-step guide plus a 3-month workbook (US & metric). Use it to set up your bin, feed right, avoid the classic beginner mistakes and track feedings, moisture, temperature and harvests. Instant PDF download: $12.95 launch price $17 regular.
Harvesting worm castings and worm tea
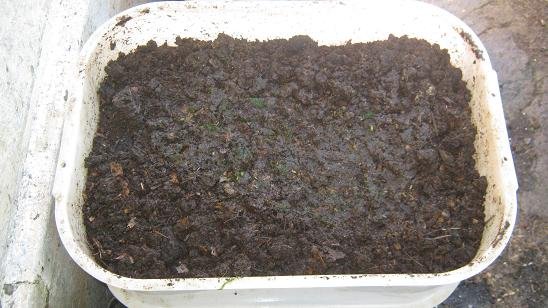
After a few months, the bedding and food will have turned into dark, crumbly castings. In a stacking bin this is easy: once the worms have moved up into the tray with fresh food, empty the lower tray. Read how to harvest worm castings from stacking bins. In a single bin, push the finished material to one side and feed on the other; most worms will follow the food within a few weeks.
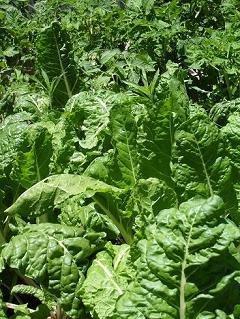
Use castings as a top dressing around plants, mix them into potting soil or add a handful to planting holes. My worm castings page shows what they did in our sandy garden beds.
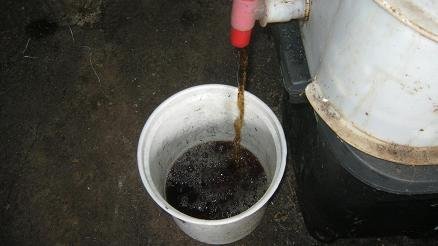
The liquid that drains from the bottom of a bin can be diluted and used to water plants. Many gardeners also brew worm tea from castings – see worm tea: organic fertilizer and natural pesticide.
Troubleshooting common worm bin problems
- Bad smell: usually too much food or too wet. Stop feeding for a week and add dry cardboard.
- Fruit flies, maggots or other flies: always cover food and avoid meat. See how to get rid of maggots and flies in my worm bin.
- Cockroaches: read my worm farm has cockroaches in it.
- Worms trying to escape: check moisture, temperature and whether something sour or salty went in.
Still stuck? My worm bin troubleshooting guide and free helpline answers the questions readers have sent me over many years.
Pet waste, worm businesses and beyond
Worms can also handle dog poop in a separate, dedicated bin far away from your vegetable garden – see worm composting dog poop, what kind of worms eat feces and keeping black soldier flies out of a dog poop worm bin.
And if you get hooked (many of us do!), worm farming can grow into a small business. Start with starting a worm business and my book How to Start a Profitable Worm Business on a Shoestring Budget.
Want to know who’s behind this site? Read about me, Stephan Kloppert. Or browse everything on the learn page.